# spine-haxe Runtime Documentation
> **Licensing**
>
> See the [Spine Runtimes License](/spine-runtimes-license) before integrating the Spine Runtimes into your applications.
# Getting Started
The spine-haxe runtime is composed of a core module, that is a Haxe implementation of the renderer-agnostic Spine Runtimes core APIs, and the following specific renderer implementations:
- [Starling](https://lib.haxe.org/p/starling/)
- [HaxeFlixel](https://lib.haxe.org/p/flixel/) (minimum supported version 5.9.0)
The spine-haxe has been tested using HTML5 as target and it is currently compatible with [WebGL](https://developer.mozilla.org/en-US/docs/Web/API/WebGL_API) to render. It supports all Spine features except premultiplied alpha atlases and two color tinting.
## Installation
The core module of spine-haxe has zero dependencies.
The starling rendering implementation has two dependencies: openfl and starling.
```plain
haxelib install openfl
haxelib install starling
```
The haxeflixel rendering implementation has two dependencies: openfl and flixel. We recommend to follow the installation guide on the [HaxeFlixel](https://haxeflixel.com/documentation/install-haxeflixel/) website.
Once you have installed the dependencies, you can [download the latest version of spine-haxe](/files/spine-haxe/4.2/spine-haxe-latest.zip) and install it:
```plain
haxelib install spine-haxe-x.y.z.zip
```
Notice that the spine-haxe library is not available on [lib.haxe.org](https://lib.haxe.org/). This is why you need to download the library and install it through the zip archive.
## Examples
The spine-haxe runtime includes several examples demonstrating its feature set.
To run the examples locally:
1. Install Git and [Haxe](https://haxe.org/download/) for your operating system
2. Configure haxelib and install all necessary dependencies
```plain
haxelib setup
haxelib install openfl
haxelib run openfl setup
haxelib install starling
haxelib install flixel
```
3. Clone the spine-runtimes repository, navigate to the `spine-runtimes/spine-haxe` folder, and run lime with the test command:
```plain
git clone https://github.com/esotericsoftware/spine-runtimes
cd spine-runtimes/spine-haxe
haxelib dev spine-haxe .
lime test html5
```
This builds the spine-haxe runtime, then opens a browser window displaying the examples in a webpage.
Click on the Starling or HaxeFlixel button to start the examples for the specific runtime. Then click on the frame, or on the button, to go through all the examples, and check out the code in the [`spine-runtimes/spine-haxe/example/src`](/git/spine-runtimes/spine-haxe/example/src) folder.
## Updating the spine-haxe Runtime
Before updating your project's spine-haxe runtime, please consult our [guide on Spine editor and runtime version management](/spine-runtime-architecture#Versioning).
To update the spine-haxe runtime download the desired version from `https://esotericsoftware.com/files/spine-haxe/4.2/spine-haxe-x.y.z.zip` changing `x.y.z` respectively. Then run `haxelib install spine-haxe:x.y.z.zip`.
> **Note:** If you change the `major.minor` version of the spine-haxe package, you have to re-export your Spine skeletons with the same Spine Editor `major.minor` version! See [Synchronizing versions](/spine-versioning#Synchronizing-versions) for more information.
# Using spine-haxe
The spine-haxe runtime supports all Spine features except premultiplied alpha atlases and two color tinting.
spine-haxe works using starling or haxeflixel as framework. It has been tested using HTML5 as target and it is currently compatible with [WebGL](https://developer.mozilla.org/en-US/docs/Web/API/WebGL_API) to render. It is not supported rendering via the [Canvas APIs](https://developer.mozilla.org/en-US/docs/Web/API/Canvas_API).
We try to keep the class names and API as similar as possible between frameworks. Right now, the main difference is how bounds are calculated.
## Asset Management
### Exporting for spine-haxe
Follow the instructions in the Spine User Guide on how to:
1. [Export skeleton & animation data](/spine-export)
2. [Export texture atlases containing the images of your skeleton](/spine-texture-packer)
An export of the skeleton data and texture atlas of your skeleton will yield the following files:
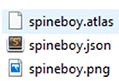
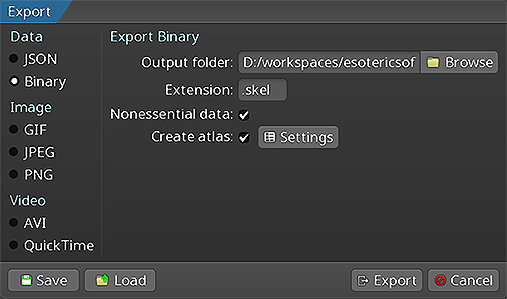
1. `skeleton-name.json` or `skeleton-name.skel`, containing your skeleton and animation data, either in the JSON or binary format.
2. `skeleton-name.atlas`, containing information about the texture atlas.
3. One or more `.png` files, each representing one page of your texture atlas containing the packed images your skeleton uses.
> **Note**: You should prefer binary skeleton exports over JSON exports, as they are smaller in size and faster to load.
When serving these files, make sure the server emits the correct MIME types.
### Updating Spine Assets
During development, you may frequently update your Spine skeleton data and texture atlas files. You can simply overwrite these source files (.json, .skel, .atlas, .png) by re-exporting from the Spine Editor and replacing the existing files in your Haxe project.
Ensure that the `major.minor` version of spine-haxe matches the `major.minor` Spine Editor version you are exporting from. See [Synchronizing versions](/spine-versioning#Synchronizing-versions) for more information.
## Core classes
The spine-haxe API is built on top of the a generic Haxe runtime that does not depend on starling and openfl. It provides platform independent core classes and algorithms to load, query, modify, and animate Spine skeletons.
Here, we will briefly discuss the most important core classes that you will encounter in your day-to-day use of spine-haxe. Please consult the [Spine Runtimes Guide](/spine-runtimes-guide)
for a detailed overview of the Spine Runtimes architecture, core classes, and API usage.
The [`TextureAtlas`](/git/spine-runtimes/spine-ts/spine-core/src/TextureAtlas.ts) class stores the data loaded from an `.atlas` file and its corresponding `.png` image files.
The [`SkeletonData`](/git/spine-runtimes/spine-ts/spine-core/src/SkeletonData.ts) class stores the data loaded from a `.json` or `.skel` skeleton file. The skeleton data contains information about the bone hierarchy, slots, attachments, constraints, skins, and animations. A `SkeletonData` instance is usually loaded by also providing an `Atlas` from which it sources the images to be used by the skeleton it represents. It serves as a blueprint for creating `Skeleton` instances. Multiple skeletons can be instantiated from the same atlas and skeleton data, which then share the loaded data, minimizing both load times and memory consumption at runtime.
The [`Skeleton`](/git/spine-runtimes/spine-ts/spine-core/src/Skeleton.ts) class stores an instance of a skeleton, created from a `SkeletonData` instance. A skeleton stores its current pose, that is the position of bones and the current configuration of slots, attachments, and active skin. The current pose can be computed by either manually modifying the bone transforms, or, more commonly, by applying animations via an `AnimationState`.
The [`AnimationState`](/git/spine-runtimes/spine-ts/spine-core/src/AnimationState.ts) class is responsible for keeping track of which animation(s) should be applied to a skeleton, advancing and mixing those animations based on the elapsed time between the last and current rendering frame, and applying the animations to a skeleton instance, thereby setting its current pose. The `AnimationState` queries an [`AnimationStateData`](/git/spine-runtimes/spine-ts/spine-core/src/AnimationStateData.ts) instance to retrieve mixing times between animations, or fetches the default mix time if no mixing time is available for a pair of animations.
The spine-haxe runtime for starling builds on top of these core classes.
## Spine Haxe runtime for starling
The spine-haxe for starling exposes two classes: [`StarlingTextureLoader`](/git/spine-runtimes/spine-haxe/spine-haxe/spine/starling/StarlingTextureLoader.hx) and [`SkeletonSprite`](/git/spine-runtimes/spine-haxe/spine-haxe/spine/starling/SkeletonSprite.hx).
`StarlingTextureLoader` is an implementation of the spine [`TextureLoader`](/spine-loading-skeleton-data#TextureLoader) to create and dispose images in starling.
`SkeletonSprite` is an extension of the starling [`DisplayObject`](https://doc.starling-framework.org/current/starling/display/DisplayObject.html) to play spine animations.
### Loading Spine Assets
Spine assets, like skeleton data `.json`/`.skel` files, or `.atlas` files, are loaded through the openfl [`Assets`](https://api.openfl.org/openfl/utils/Assets.html) class.
Before an instance of a `SkeletonSprite` can be created, the respective skeleton and atlas files must be loaded. You can use:
* `Assets.getText(string)`: loads text based assets like `.json` and `.atlas` files.
* `Assets.getBytes(string)`: loads binary based asset like `.skel` files.
Assuming you have exported your skeleton data to a binary skeleton file called `skeleton.skel`, and your atlas to a file called `skeleton.atlas` with one corresponding `skeleton.png` file, you can load your assets like this:
```haxe
var atlasFile = Assets.getText("skeleton.atlas");
var skeletonFile = Assets.getBytes("skeleton.skel");
```
Once assets are loaded, you need to get instances of a `TextureAtlas` and a `SkeletonData`:
```haxe
var atlas = new TextureAtlas(atlasFile, new StarlingTextureLoader("skeleton.atlas"));
var skeletondata = SkeletonData.from(skeletonFile, atlas);
```
Notice how the `TextureAtlas` constuctor needs an instance of `StarlingTextureLoader`. You have to provide the name of the atlas file to the `StarlingTextureLoader`. The individual texture atlas page images are loaded transparently without the need for explicitly loading them.
The skeleton raw data and atlas on their own can not be animated or rendered. Instead, a [`SkeletonSprite`](/git/spine-runtimes/spine-haxe/spine-haxe/spine/starling/SkeletonSprite.hx) is constructed from them. `SkeletonSprite`s instantiated with the same assets share the same skeleton data and atlas.
### Creating SkeletonSprite instances
Once skeleton raw data and a corresponding atlas have been loaded, you need to instantiate an `AnimationStateData` before being able to instantiate a `SkeletonSprite`:
```haxe
var animationStateData = new AnimationStateData(skeletondata);
```
Now you can instantiate the `SkeletonSprite`:
```haxe
// Instantiate the SkeletonSprite
var skeletonSprite = new SkeletonSprite(skeletondata, animationStateData);
// Add the SkeletonSprite as a child of the DisplayObject in the stage
addChild(spineboy);
```
The `SkeletonSprite` constructor takes the `SkeletonData` and the `AnimationStateData` to make an instance.
### Bounds
The `SkeletonSprite` uses a `BoundsProvider` to calculate bounds. By default, it uses `SetupPoseBoundsProvider` which calculates bounds based on the skeleton's setup pose. You can pass a custom `BoundsProvider` as the third parameter to the `SkeletonSprite` constructor:
```haxe
// Use setup pose bounds (default)
var skeletonSprite = new SkeletonSprite(skeletondata, animationStateData);
// Use bounds for specific skins and animations
var skeletonSprite = new SkeletonSprite(skeletondata, animationStateData,
new SkinsAndAnimationBoundsProvider(["default"], ["walk", "run"]));
// Use a simple AABB rectangle
var skeletonSprite = new SkeletonSprite(skeletondata, animationStateData,
new AABBRectangleBoundsProvider(0, 0, 200, 200));
// Use current pose bounds and recalculate bounds every frame to get precise bounds
var skeletonSprite = new SkeletonSprite(skeletondata, animationStateData,
new CurrentPoseBoundsProvider());
```
The `SkeletonSprite` exposes a `calculateBounds()` method that recalculates bounds on demand, which is useful when using `CurrentPoseBoundsProvider` or need the exact position of the bounds:
```haxe
var skeletonSprite = new SkeletonSprite(skeletondata, animationStateData, new CurrentPoseBoundsProvider());
// ... later, after animations have been applied
skeletonSprite.calculateBounds(); // Update bounds based on current pose
```
You can access the bounds via the `bounds` property. The bounds are automatically updated when you change the scale of the `SkeletonSprite`.
## Spine Haxe runtime for haxeflixel
Everything explained in the paragraph dedicated to starling is valid also for haxeflixel.
The exceptions are:
- `SkeletonSprite` extends [`FlxTypedGroup`](https://api.haxeflixel.com/flixel/group/FlxTypedGroup.html)<FlxObject> rather than a `FlxObject`. This is necessary to properly support bounds that are independent of position.
- `StarlingTextureLoader` is named `FlixelTextureLoader`, but has the same purpose and API.
- Bounds work the same way as in Starling using the `BoundsProvider` system. See the [Bounds](#Bounds) section for details.
## SkeletonSprite
A `SkeletonSprite` handles storing, updating, and rendering a `Skeleton` and its associated `AnimationState`. `SkeletonSprite` instances are created from a skeleton data and an atlas, as described in the previous section. The `Skeleton` and `AnimationState` are accessible through the `skeleton` and `state` fields respectively.
Every frame, the `SkeletonSprite` will:
* Update the `AnimationState`
* Apply the `AnimationState` to the `Skeleton`
* Update the `Skeleton` world transforms, resulting in a new pose
* Render the `Skeleton` in its current pose
### Applying Animations
Applying animations to a skeleton displayed by a `SkeletonSprite` container is done using `AnimationState`.
> **Note:** See [Applying Animations](/spine-applying-animations#AnimationState-API) in the Spine Runtimes Guide for more in-depth information, specifically about animation tracks and animation queueing.
To set a specific animation on track 0, call AnimationState `setAnimation`:
```haxe
spineObject.state.setAnimation(0, "walk", true);
```
The first parameter specifies the track, the second parameter is the name of the animation, and the third parameter defines whether to loop the animation.
You can queue multiple animations using `addAnimation`:
```haxe
spineObject.state.setAnimation(0, "walk", true);
spineObject.state.addAnimation(0, "jump", 2, false);
spineObject.state.addAnimation(0, "run", 0, true);
```
The first parameter to `addAnimation` is the track. The second parameter is the name of the animation. The third parameter specifies the delay in seconds, after which this animation should replace the previous animation on the track. The final parameter defines whether to loop the animation.
In the example above, the `"walk"` animation is played back first. 2 seconds later, the `"jump"` animation is played back once, followed by a transition to the `"run"` animation, which will be looped.
When transitioning from one animation to another, `AnimationState` will mix (crossfade) the animations for a specific duration. These mix durations are defined in an `AnimationStateData` instance, from which the `AnimationState` retrieves them.
The `AnimationStateData` instance is also available through the `AnimationState.data` property. You can set the default mix duration, or the mix duration for a specific pair of animations:
```
spineObject.state.data.setDefaultMix = 0.2;
spineObject.state.data.setMixByName("walk", "jump", 0.1);
```
When setting or adding an animation, a `TrackEntry` object is returned, which allows further modification of that animation's playback. For example, you can set the mix duration or reverse the animation playback:
```
const entry = spineObject.state.setAnimation(0, "walk", true);
entry.reverse = true;
```
See the [`TrackEntry` class documentation](/git/spine-runtimes/spine-ts/spine-core/src/AnimationState.ts#L785) for more options.
> **Note:** Be careful about holding on to `TrackEntry` instances outside the function you are using them in. Track entries are re-used internally and will thus become invalid once the track entry [dispose event](/spine-api-reference#AnimationStateListener-dispose) occurs.
You can use empty animations to smoothly mix the skeleton from the setup pose to an animation, or from an animation to the setup pose:
```
spineObject.state.setEmptyAnimation(0, 0);
spineObject.state.addAnimation(0, "walk", 0).mixDuration = 0.5;
spineObject.state.addEmptyAnimation(0, 0.5, 6);
```
Like `setAnimation`, the first parameter to `setEmptyAnimation()` specifies the track. The second parameter specifies the mix duration in seconds used to mix out the previous animation and mix in the "empty" animation.
Like `addAnimation`, the first parameter to `addEmptyAnimation()` specifies the track. The second parameter specifies the mix duration. The third parameter is the delay in seconds, after which the empty animation should replace the previous animation on the track via mixing.
All animations on a track can be cleared immediately via `AnimationState.clearTrack()`. To clear all tracks at once, `AnimationState.clearTracks()` can be used. This will leave the skeleton in the last pose it was in, which is not usually desired. Instead, use empty animations to mix smoothly to the setup pose.
To reset a skeleton to its setup pose, use `Skeleton.setupPose()`:
```
spineObject.skeleton.setupPose();
```
This will reset both the bones and slots to their setup pose configuration. Use `Skeleton.setupPoseBones()` or `Skeleton.setupPoseSlots()` to only reset the bones or slots to their setup pose configuration.
### AnimationState Events
An `AnimationState` emits events during the lifecycle of an animation that is being played back. You can listen for these events and react as needed. The Spine Runtimes API defines the following [event types](/git/spine-runtimes/spine-ts/spine-core/src/AnimationState.ts#L1108):
* `start`: emitted when an animation is started.
* `interrupt`: emitted when an animation's track was cleared, or a new animation was set.
* `end`: emitted when an animation will never be applied again.
* `dispose`: emitted when the animation's track entry is disposed.
* `complete`: emitted when an animation completes a loop.
* `event`: emitted when a user defined [event](/spine-events#Events) happened.
To receive events, you can register an [`AnimationStateListener`](/git/spine-runtimes/spine-ts/spine-core/src/AnimationState.ts#L1117) callback with either the `AnimationState` to receive events across all animations, or with the `TrackEntry` of a specific animation queued for playback:
```haxe
// add callback to the AnimationState
spineObject.state.onStart.add(entry -> trace('Started animation ${entry.animation.name}'));
spineObject.state.onInterrupt.add(entry -> trace('Interrupted animation ${entry.animation.name}'));
spineObject.state.onEnd.add(entry -> trace('Ended animation ${entry.animation.name}'));
spineObject.state.onDispose.add(entry -> trace('Disposed animation ${entry.animation.name}'));
spineObject.state.onComplete.add(entry -> trace('Completed animation ${entry.animation.name}'));
spineObject.state.onEvent.add((event entry) -> trace('Custom event for ${entry.animation.name}: ${event.data.name}'));
// add callback to the TrackEntry
var trackEntry = spineObject.state.setAnimationByName(0, "walk", true);
trackEntry.onEvent.add((entry, event) => trace('Custom event for ${entry.animation.name}: ${event.data.name}'));
```
See the [`EventsExample.hx`](/git/spine-runtimes/spine-haxe/example/src/EventsExample.hx) example.
## Skins
Many applications and games allow users to create custom avatars out of many individual items, such as hair, eyes, pants, or accessories like earrings or bags. With Spine, this can be achieved by [using skins](/spine-examples-mix-and-match).
You can create custom skins from other skins like this:
```haxe
const skeletonData = spineObject.skeleton.data;
const skin = new spine.Skin("custom");
skin.addSkin(skeletonData.findSkin("skin-base"));
skin.addSkin(skeletonData.findSkin("nose/short"));
skin.addSkin(skeletonData.findSkin("eyelids/girly"));
skin.addSkin(skeletonData.findSkin("eyes/violet"));
skin.addSkin(skeletonData.findSkin("hair/brown"));
skin.addSkin(skeletonData.findSkin("clothes/hoodie-orange"));
skin.addSkin(skeletonData.findSkin("legs/pants-jeans"));
skin.addSkin(skeletonData.findSkin("accessories/bag"));
skin.addSkin(skeletonData.findSkin("accessories/hat-red-yellow"));
spineObject.skeletonskin = skin;
spineObject.skeleton.setupPoseSlots();
```
Create a new, empty skin with the `Skin()` constructor.
Next, fetch the `SkeletonData` from the skeleton. It is used to look up skins by name via `SkeletonData.findSkin()`.
Add all the skins you want to combine into the new skin via `Skin.addSkin()`.
Finally, set the new skin on the `Skeleton` and call `Skeleton.setupPoseSlots()` to ensure no attachments from previous skins and/or animations are left attached.
See [`MixAndMatchExample.hx`](/git/spine-runtimes/spine-haxe/example/src/MixAndMatchExample.hx) for full example code.
## Setting Bone Transforms
When authoring a skeleton in the Spine Editor, the skeleton is defined in what is called the skeleton's world coordinate system or "skeleton coordinate system". This coordinate system may not align with the coordinate system of Haxe. Mouse and touch coordinates relative to the `SkeletonSprite` need thus be converted to the skeleton coordinate system, e.g. if a user should be able to move a bone by touch.
The `SkeletonSprite` offers the method `haxeWorldCoordinatesToBone(point, bone)` which takes a point relative to the `SkeletonSprite` and converts it to the skeleton's coordinate system, relative to the specified bone.
The reverse, that is converting from the skeleton coordinate system to the Haxe coordinate system, can be achieved via `SkeletonSprite.skeletonToHaxeWorldCoordinates(point)`.
See [`ControlBonesExample.hx`](/git/spine-runtimes/spine-haxe/example/src/ControlBonesExample.hx) for full example code.
## Spine Runtimes API access
spine-haxe for starling and haxeflixel exposes the entire core APIs via the `SkeletonSprite` properties `skeleton`, `state`, and `state.data`. See the JS doc documentation of these classes as well as the generic [Spine Runtimes Guide](/spine-runtimes-guide).
## Minimal project setup
If you just want to run a Spine animation in Haxe, or you want to start a project with a Spine animation, you can follow these steps.
### Starling minimal project
Once you have installed all the [necessary dependencies](#Installation), create a new project using:
```plain
openfl create starling:project MySpineProject
```
This will create a folder named `MySpineProject` containing all the files needed to run an empty project with OpenFL.
Open `MySpineProject` with your favorite haxe IDE. Copy your assets into the `Assets` folder. Edit the `project.xml` file and add spine-haxe as a dependency like this:
```xml
```
If you want to load a `.skel` binary skeleton, replace this line:
```xml
```
With the following (otherwise openfl will load `skel` files as text, corrupting them):
```xml
```
Open the `Source/Game.hx` file and change the costructor with the following one:
```haxe
public function new () {
super ();
var atlas = new TextureAtlas(
Assets.getText("assets/raptor.atlas"),
new StarlingTextureLoader("assets/raptor-pro.atlas"));
var skeletondata = SkeletonData.from(Assets.getText("assets/raptor-pro.json"), atlas, .5);
var animationStateData = new AnimationStateData(skeletondata);
var skeletonSprite = new SkeletonSprite(skeletondata, animationStateData);
skeletonSprite.x = Starling.current.stage.stageWidth / 2;
skeletonSprite.y = Starling.current.stage.stageHeight * .75;
skeletonSprite.state.setAnimationByName(0, "walk", true);
addChild(skeletonSprite);
Starling.current.juggler.add(skeletonSprite);
}
```
Don't forget to import the necessary classes. Now run you code from you IDE or using the following command from the terminal on your project folder:
```
lime test html5
```
### Haxeflixel minimal project
Once you have installed all the [necessary dependencies](#Installation), create a new project using:
```plain
haxelib run flixel tpl -n "MySpineProject"
```
This will create a folder named `MySpineProject` containing all the files needed to run an empty project with OpenFL.
Open `MySpineProject` with your favorite haxe IDE. Copy your assets into the `assets` folder. Edit the `Project.xml` file and add spine-haxe as a dependency like this:
```xml
```
If you want to load a `.skel` binary skeleton, replace this line:
```xml
```
With the following (otherwise openfl will load `skel` files as text, corrupting them):
```xml
```
Open the `source/PlayState.hx` file and change the `create` method with the following one:
```haxe
override public function create()
{
super.create();
var atlas = new TextureAtlas(
Assets.getText("assets/spineboy.atlas"),
new FlixelTextureLoader("assets/spineboy-pro.atlas"));
var skeletondata = SkeletonData.from(Assets.getBytes("assets/spineboy-pro.skel"), atlas, .5);
var animationStateData = new AnimationStateData(skeletondata);
var skeletonSprite = new SkeletonSprite(skeletondata, animationStateData);
skeletonSprite.screenCenter();
skeletonSprite.state.setAnimationByName(0, "walk", true);
add(skeletonSprite);
}
```
Don't forget to import the necessary classes. Now run you code from you IDE or using the following command from the terminal on your project folder:
```
lime test html5 -debug
```
## VS Code setup
As an IDE, we recommend [Visual Studio Code](https://code.visualstudio.com/) with the following extension:
1. [Haxe extension](https://marketplace.visualstudio.com/items?itemName=nadako.vshaxe)
2. [HXCPP debugger extension](https://marketplace.visualstudio.com/items?itemName=vshaxe.hxcpp-debugger)
3. [Lime extension](https://marketplace.visualstudio.com/items?itemName=openfl.lime-vscode-extension)
The extensions provide IDE features like auto-completion, debugging, and build support.
To debug a build, set the corresponding Lime target in the status bar at the bottom of VS Code to e.g. `HTML5 / Debug`. Run the `lime` run configuration by pressing `F5`.